Disable Windows Update
As central as it is to the core of Windows 10, Windows Update is actually just another Windows process so it can be stopped with these simple steps:
- Open the Run command (Win + R), in it type: services.msc and press enter
- From the Services list which appears find the Windows Update service and open it
- In ‘Startup Type’ (under the ‘General’ tab) change it to ‘Disabled’
- In the task manager, you should now see task "wuauserv" in the "Stopped" state
- Restart the PC.
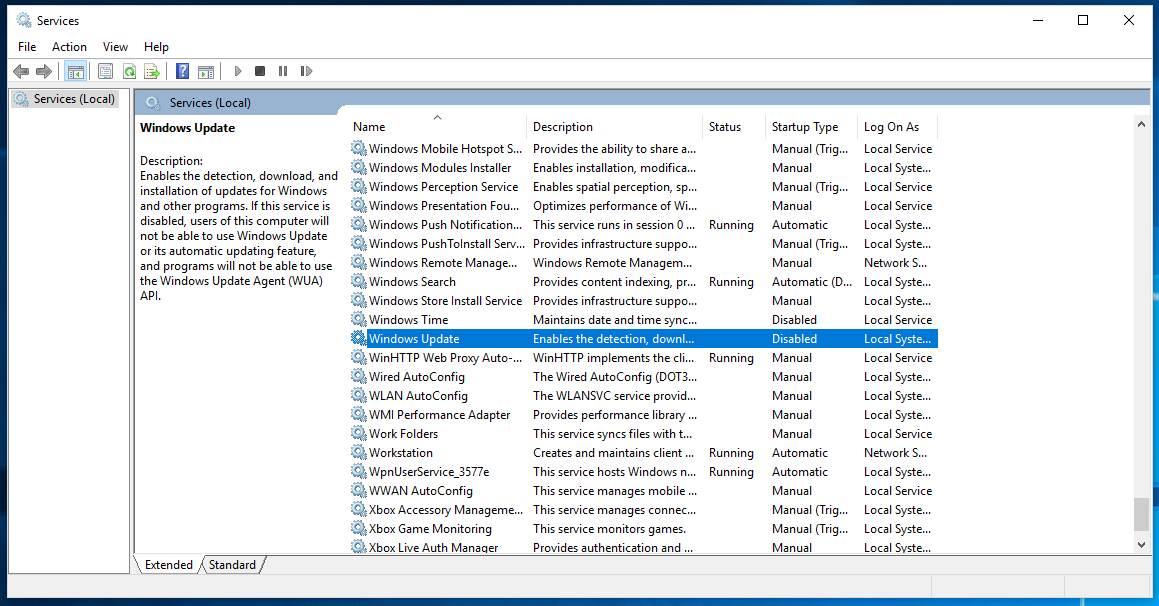
- Now in the Services list, shown below, Windows Update should show up as "Disabled"

Of course, every now and then, when convenient, you should re-enable Windows Update to get the latest updates, especially security patches.
To re-enable Windows Update simply repeat these four steps, but change the Startup Type to ‘Automatic’
It turns out that the above is not enough. Windows 10 will somehow re-enable Windows Update on it's own. Evil.
Trying the steps below to see if it helps:
- Win+R to open Run dialog (must be administrator)
- Open: services.msc
- Double click Windows Update service to open properties
- Click Stop to halt the service.
- Click the Log On tab
- Select Log on as: This account: .\Guest
- Leave password blank
- Click Apply
An error will be logged in the System Log each time Windows attempts to start the service: "The account specified for this service is different from the account specified for other services running in the same process."
To enable updates, repeat the procedure but set Log on as: Local System account and start the service.

